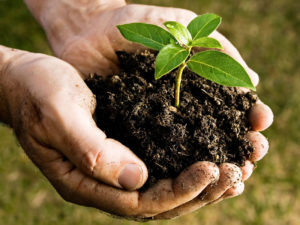
Bruno Follador is an agrarian geographer and director of the Living Soils Initiative at The Nature Institute in Ghent, New York. His interest in composting practices grew out of his work on biodynamic farms in Brazil, the United States, and in Europe, where he learned to look at compost as the centre of the biological, cultural, and social life of any farm.
 Follador’s presentation was far more than a practical guide to managing compost – it was a kind of sustained reflection on humus infused with poetry, cultural analysis, and an abiding love of the subject. I did, however, tease out a sense of the life cycle of a compost windrow, in which the essential biological principles involved in making humus – structure, composition, temperature, moisture, siting, maintenance – are all interconnected.
Begin by making the decision to compost correctly. This can involve accepting that the way you’re doing things might be damaging your soil. Piling up manure and old bedding, for instance, can build up too much potassium, drive out boron, zinc, and calcium, lock up nitrogen, and deplete oxygen, a recipe that invites weed pressure, among other things. The more common lasagna pile has its own fundamental flaw: more often than not, different layers run at different temperatures, creating healthy and unhealthy zones with your pile.
Once you’ve found a good site that’s accessible to third parties delivering materials and accommodates your tractor, it’s time to start thinking about ingredients, especially your sources of carbon, and especially in relation to temperature, moisture, and structure. At what point does the carbon in any specific ingredient become available? Does it promote porosity, water retention, and oxygenation? Wood chips, for instance, release carbon very slowly, and are thus best to add early to give the windrow structure; leaves release carbon immediately and break down quickly and are best added after the initial mix; straw is hollow, making it a good way to introduce oxygen and promote the action of bacteria by providing them with maximal surface area. Whatever your major ingredients are, ten per cent of a windrow’s total volume should be soil. This helps speed bacterial processes, retain oxygen, and stabilise temperature and moisture; it can also help inoculate your humus with additions from the “mother” soil.
Lay out your ingredients in piles and plan to mix whole windrows as materials become available. (Mucking out livestock areas by sections throughout the year rather than all at once helps provide a steady source of manure, and ensures all-around healthy windrows.) When it comes time to build a windrow, use a bucket loader to create triangular prisms three to four bucket-lengths long and about six feet high. To get consistent decomposition, build and mix at the same time. Layer the compost initially by moisture and temperature: first straw, then manure, then wood chips (for example). To mix, lift your bucket, drive forward until your front wheels touch the row, curl the bucket down and lower to the ground, reverse to pull compost away from the windrow, scoop, go forward, and feather ingredients back into windrow. Repeat until everything is well mixed, and water the windrow.
Turn the windrow about once per month (you can turn more often, but do not let four weeks go by without turning it). Since heat concentrates near the top of the windrow, make sure you take temperature readings with a long thermometer that can reach well into the centre (like a Reotemp analogue thermometer). Internal temperature will fluctuate between 55C and 65C; turning will cool the pile initially, but will lead to rapid heating as oxygen is incorporated. The best way to inspect the windrow is by dragging out a cross-section with your bucket loader and inspecting it for colour, temperature, and moisture. Moisture content should be between 40% and 65%. Do a squeeze test: if compost is squeezed and drips, it’s around 60%; if it does not drip and/or leaves no stain on your hand, then it’s around 40%. It’s better to stay on the wetter side as a buffer against heat, since carbon can still ash at 55-65C if it’s too dry. Be aware that too much moisture is harmful, though. Cover your windrow with TopTex or ComposTex fleece to help shed rain and snowfall and protect the compost against direct sunlight.
It’s tough to say with compost is “done.” Within five months, the temperature of your compost should have stabilized to a constant temperature close to the ambient air. Perform germination tests at any time with wheat, watercress, and radish. Above all, strive to develop “a personal relationship with compost.”
Summary by EFAO member John Ondrovcik